In October of 2022, the Connectivity Standards Alliance announced the release of the Matter 1.0 specification and SDK. With this release, anyone building on Arm will be able to produce and sell home automation services. The combination of the Matter protocol and Arm standards such as PSA certified, Project Cassini, and Project Centauri removes the fragmentation of devices from different suppliers. The race is on as Matter compliant devices have already been introduced into the market. The expectation is that a few billion Matter compliant devices will be sold over the next few years.
The next question is how to open this opportunity to all developers besides the established embedded experts. Python is one way to do so. The number of Python developers is increasing 20% per year and was estimated to be approximately 10 million in 2021. All we need now is a platform to run Matter and Python. What better choice than the ubiquitous Raspberry Pi Model B.
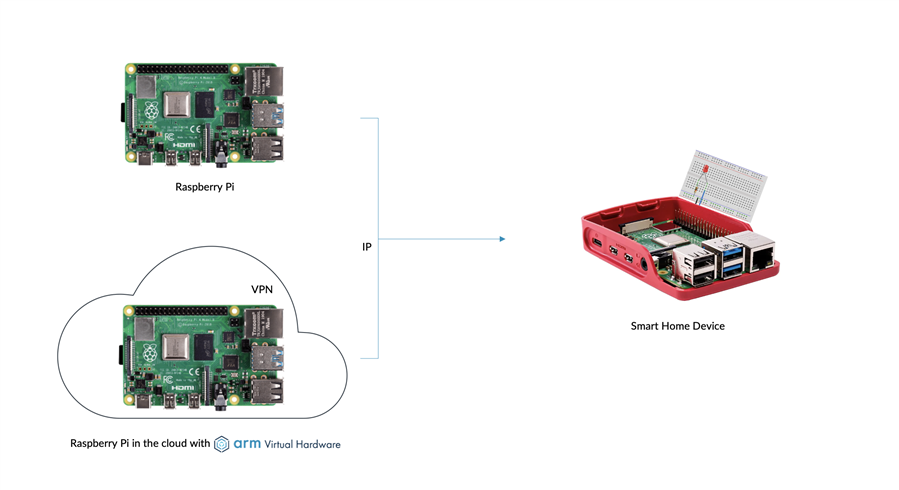
Spoiler alert, the output of this exercise is a Matter lighting home automation service created using Python. The service runs on a Raspberry Pi or a virtual Raspberry Pi in the cloud through Arm Virtual Hardware (AVH) as the same code runs on both as is. The service controls a LED that is connected to a Raspberry Pi and control is over the IP network.
To understand more about Matter and the Arm Virtual Hardware and its benefits, you can read my previous blog in this series here.
What you need
Lighting device
- Raspberry Pi 4 board
- MicroSD card, 16GB or greater in size
- USB C Power supply
- Ethernet cable
- Breadboard
- LED
- 1k ohm resistor
- Jumper wires
Device controller
For the physical board
- Raspberry Pi 4 board
- MicroSD card, 16GB or greater in size
- USB C Power supply
- Ethernet cable
For the Arm Virtual Hardware Raspberry Pi 4 board
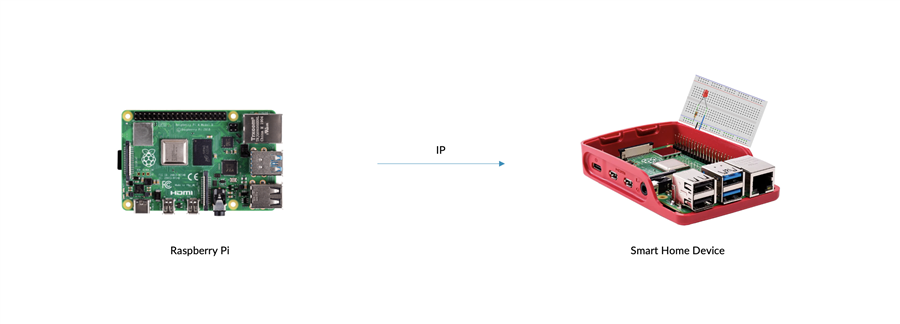
The first implementation will run the light service between two Raspberry Pi boards.
Setting up the Lighting device
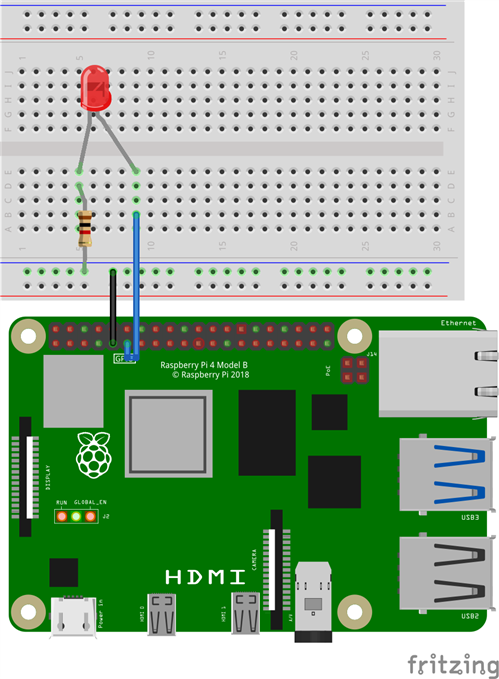
1. Use a breadboard and the jumper wires to connect the resistor and LED to the Raspberry Pi 4 board on GPIO17. Further information: Here
2. Insert the microSD card into the microSD card reader and connect it to your PC.
3. Using Raspberry Pi Imager tool to flash a microSD card with
- Click the “Choose OS” button, then click on “Raspberry Pi OS (other)” -> “Raspberry Pi OS Lite (64-bit)”
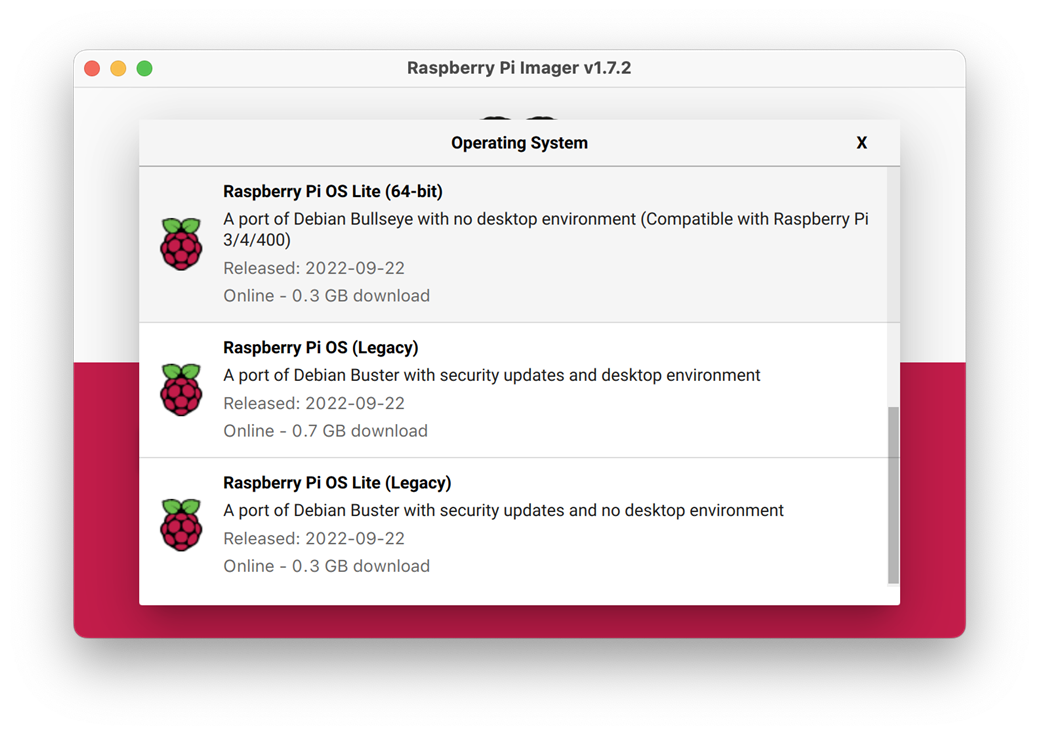
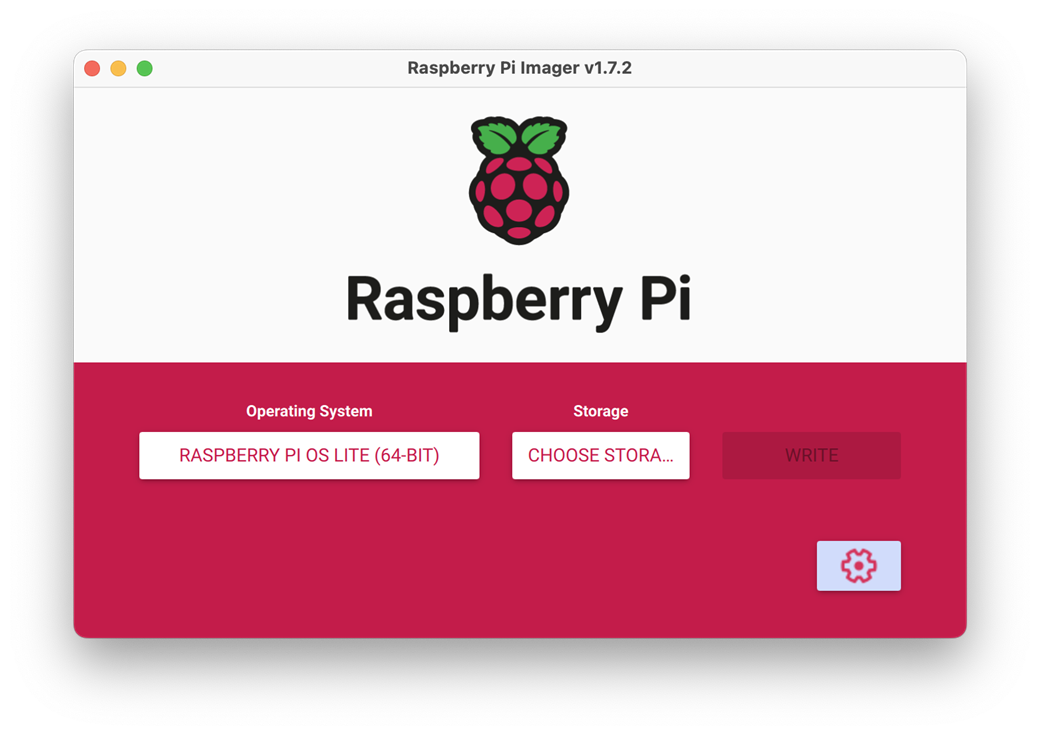
- Click the “Gear” icon in the bottom corner
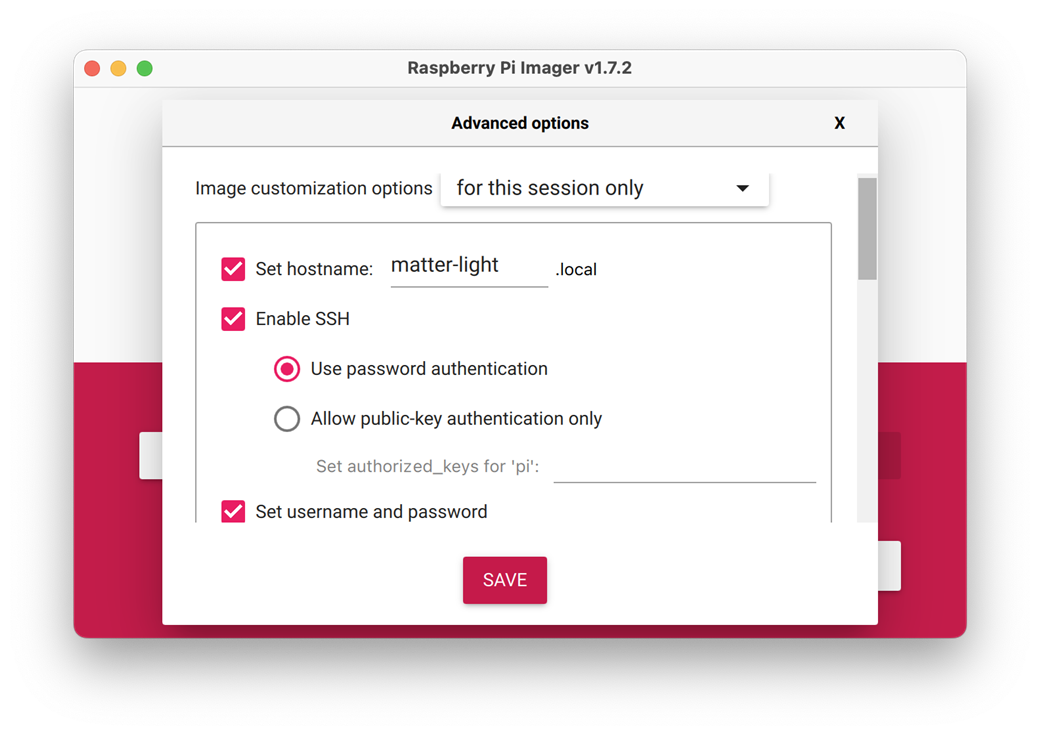
- Enter a name and set the username and password for SSH
- Click the “Choose Storage” button and select the entry for the microSD card
- Click the “Write” button
4. Insert the microSD card into the Raspberry Pi, connect the Ethernet cable to your network, and then connect power supply to the board to turn it on
5. SSH in to the Raspberry Pi using <username>@matter-light.local
6. Install build dependencies
sudo apt-get update

sudo apt-get install git gcc g++ python3 pkg-config libssl-dev libdbus-1-dev libglib2.0-dev libavahi-client-dev ninja-build python3-venv python3-dev python3-pip unzip libgirepository1.0-dev libcairo2-dev libreadline-dev
7. Clone Matter repo and submodules
git clone https://github.com/project-chip/connectedhomeip.git

cd connectedhomeip

git checkout db49235c39635582ea522929f9905af03e3114c7

./scripts/checkout_submodules.py --shallow --platform linux
8. Bootstrap the build
./scripts/build/gn_bootstrap.sh

source scripts/activate.sh
9. Build the Python and install the wheel
./scripts/build_python_device.sh --chip_detail_logging true
10. Activate Python virtual environment
source ./out/python_env/bin/activate
11. Enable GPIO permissions
sudo usermod -a -G gpio <username>
12. Install the gpiozero package (recommended from here).
pip3 install gpiozero
13. Create a new file named lighting.py with the following:
from chip.server import (
    GetLibraryHandle,
    NativeLibraryHandleMethodArguments,
    PostAttributeChangeCallback,
)

from chip.exceptions import ChipStackError

import sys
import os

from gpiozero import LED

led = LED(17)

@PostAttributeChangeCallback
def attributeChangeCallback(
    endpoint: int,
    clusterId: int,
    attributeId: int,
    xx_type: int,
    size: int,
    value: bytes,
):
    if endpoint == 1:
        if clusterId == 6 and attributeId == 0:
            if len(value) >= 1 and value[0] == 1:
                print("[PY] light on")
                led.on()
            else:
                print("[PY] light off")
                led.off()

chipLib = GetLibraryHandle(attributeChangeCallback)

input('Press enter to quit')

sys.exit(0)
14. Start the application
python3 lighting.py
To reset the device config:
rm /tmp/chip_*
Setting up the device controller (physical) device
1. Repeat steps 2-8 above, but using the name “matter-controller.local” in step 3c and 5.
2. Build and install the Device Controller wheel:
./scripts/build_python.sh -d true -i separate
3. Activate the Python virtual environment
source ./out/python_env/bin/activate
Using Arm Virtual Hardware as the device controller device
In this section, the Raspberry Pi is replaced with an AVH Raspberry Pi. The same Python service code will run as above. The difference is that one can create 100 smart hubs as such and run 100 tests in parallel if necessary as opposed to creating a board farm.
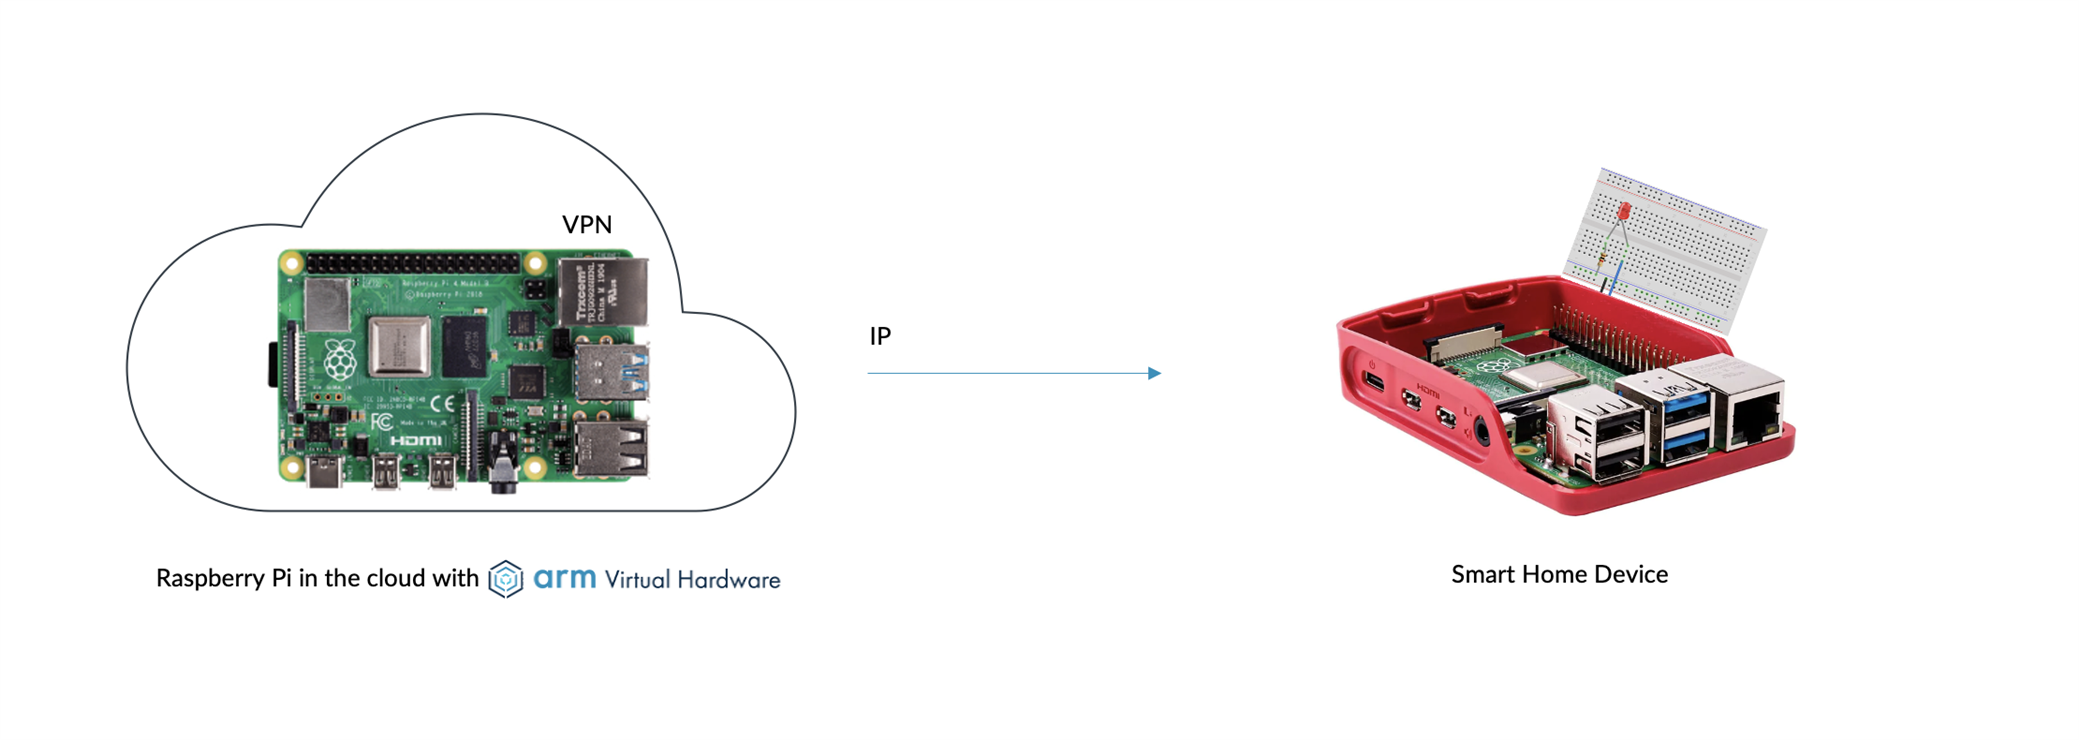
1. Create new virtual Raspberry Pi device on AVH with the Raspberry Pi OS Lite OS option.
2. Using the console interface run steps 6-8 from “Setting up the Lighting device” section
3. Run steps 2-3 from “Setting up the Device Controller (physical) device” section
4. Download the AVH VPN profile to Lighting device
5. Install openvpn on lighting device
sudo apt-get install openvpn
6. Start a new SSH session and login using: <username>@matter-light.local
7. Start VPN connection
sudo openvpn --config 'app.avh.arm.com VPN - Default Project.ovpn'
8. Restart the Python lighting app in original SSH session.
Control
1. On Device Controller device run (make sure you are in git project root!)
chip-repl
2. Discover commissionable devices
devices = devCtrl.DiscoverCommissionableNodes(filter=3840, stopOnFirst=True, timeoutSecond=20)
3. Commission the device setting node id to 233 and using code 20202021
devices[0].Commission(233, 20202021)
4. Turn the light on:
await devCtrl.SendCommand(233, 1, Clusters.OnOff.Commands.On())
5. Turn off the light:
await devCtrl.SendCommand(233, 1, Clusters.OnOff.Commands.Off())
6. Toggle the light:
await devCtrl.SendCommand(233, 1, Clusters.OnOff.Commands.Toggle())
Conclusion
The age of true home automation starts now. The Matter protocol removes the last barrier for deployment. Arm and our ecosystem deliver the IP, tools, software services, and security frameworks to best address the wildly diverse nature of smart home devices. As such, Arm is the platform on which Matter-compliant devices will emerge first. There are many Arm-based platforms on the market today for developers to get started with, such as the Raspberry Pi and the NXP i.Mx8M based boards. The platform software is usually bundled with the hardware. The Matter SDK is open source from the Connectivity Standards Alliance (CSA). Any developer simply must create the automation service on top of the Matter platform. There is no limit to what is possible. If one can imagine it, then it can be created and deployed.
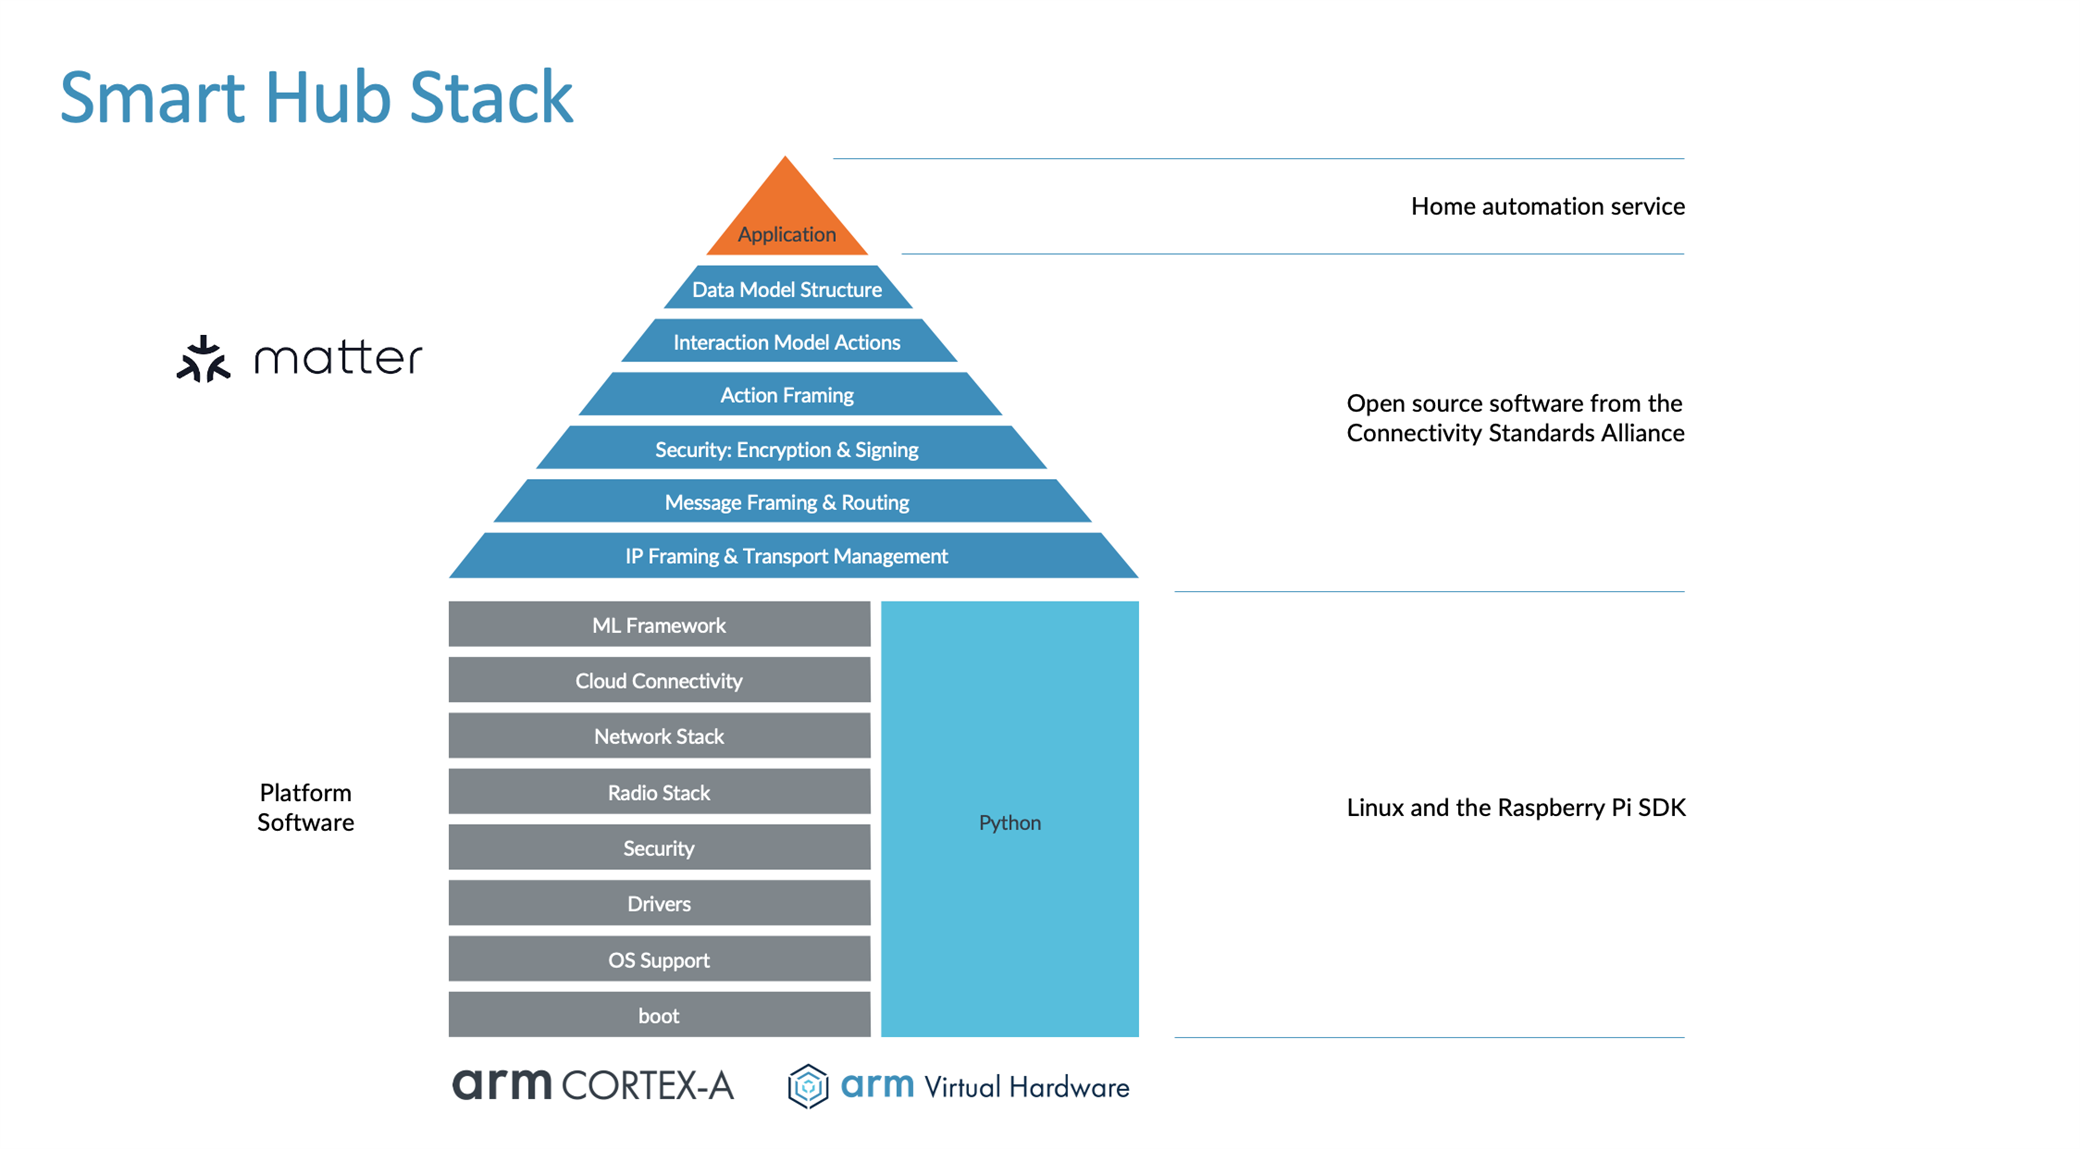
It only takes a few minutes to prepare a Matter platform and to start creating a home automation service using Python. Arm has even made the starting point so much easier by offering the Raspberry Pi on Arm Virtual Hardware. Developers can get started even when they do not yet have the hardware on their desk.
In an ideal scenario, anyone can create and test the service on a virtual Raspberry Pi and then deploy the code worldwide to a real Raspberry Pi because AVH and the real Raspberry Pi are binary compatible. The IoT runs on Arm, and we have a responsibility to create greater opportunities for innovation and scale by continually raising the bar on performance, simplified development, and software reuse. As such, we introduced Arm Virtual Hardware, a transformative offering, to enable software development in the cloud to empower developers to capture emerging market opportunities.
Explore what Arm Virtual Hardware can do for your team then:
Get started using this example by registering for the Arm Virtual Hardware private beta:
Register for Arm Virtual Hardware